 Ask Alvin (AI Chat)
Adding or Editing a Blog Post
The post detail view is used to create new Blog posts and edit existing posts.
The controls you see depend on your CMS permissions. Users with restricted permissions may not be able to access all features.
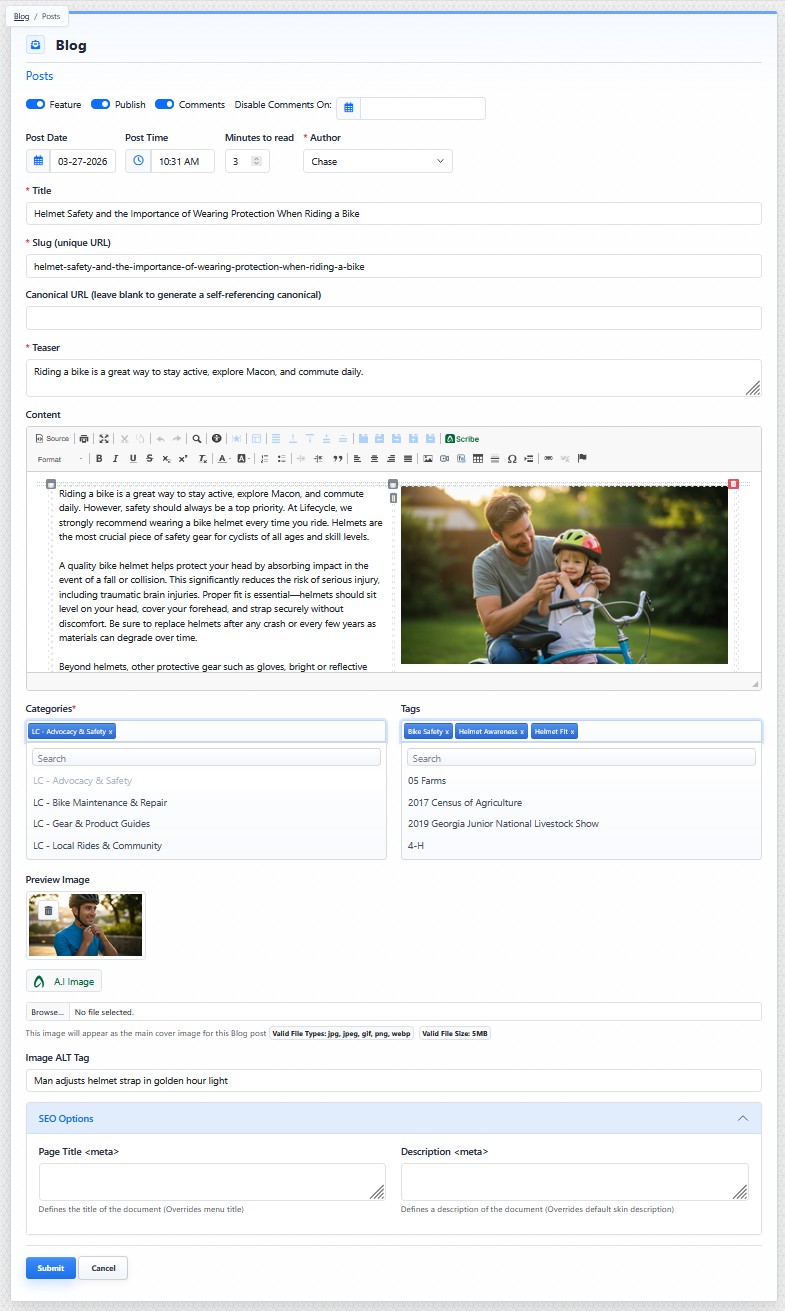
The Blog post detail view includes publication controls, content fields, categories, tags, preview image options, and SEO options.
The post detail view includes publication controls, comment controls, author selection, post identity fields, post content, categories, tags, preview image options, and SEO options.
Use this view when you need to create a new post, update post content, change publication settings, manage comment availability, assign categories or tags, update the preview image, or revise post metadata.
Add a Blog Post
To add a blog post:
- Open the Blog tool from the Plugins accordion.
- Click Add Post.
- Set the post details and comment options.
- Write the post content.
- Add categories, tags, preview image, and SEO options when needed.
- Confirm the Publish setting.
- Click Submit.
Edit an Existing Blog Post
To edit an existing blog post:
- Open the Blog tool from the Plugins accordion.
- Find the post in the Published or Unpublished tab.
- Click the post's Edit button.
- Update the needed fields.
- Click Submit.
The post detail view includes several specialized fields. Some fields affect how the post appears to visitors. Other fields support SEO, organization, commenting, or reuse of information across multiple posts.
Other articles in this section explain the main parts of the post detail view in the order they appear on the form.
Learn More
For publication settings and comment options, see Setting Blog Post Details and Comment Options. For post copy and content fields, see Writing Blog Post Content. For categories, tags, preview images, and SEO options, see Organizing and Optimizing Blog Posts.