 Ask Alvin (AI Chat)
Managing Calendar Venues
Venues are reusable location records that can be assigned to calendar events.
Use venues when an event should display a location, address, map link, or venue image.
The Venues module is opened from the Calendar tool using the Venues button.
Venue List View
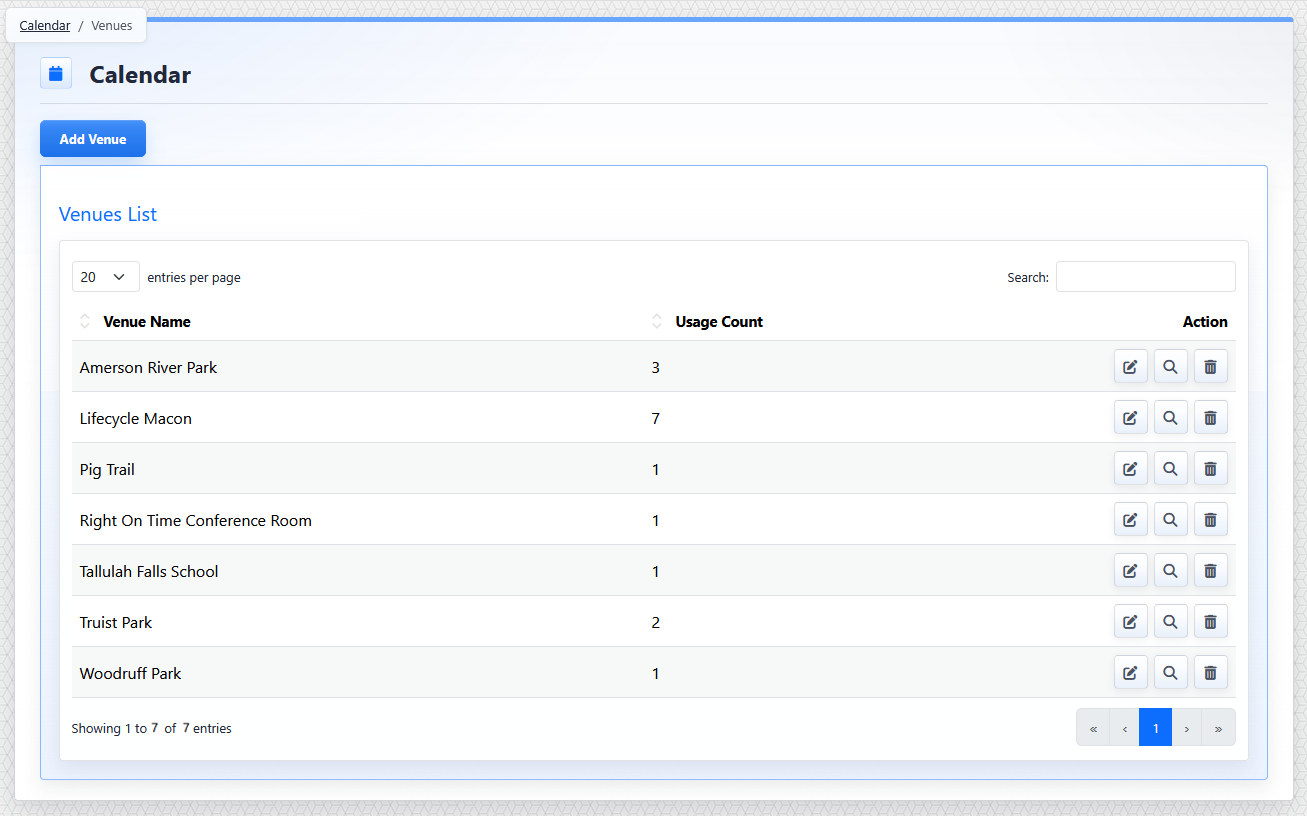
The venue list view shows existing venues, usage counts, and venue action buttons.
The venue list view shows existing venues. Each row includes the venue name, usage count, and action buttons.
Usage Count shows how many events are associated with that venue.
Venue row actions include:
- Edit: opens the venue detail view.
- View Usage: opens the Calendar event list filtered to events using that venue.
- Delete: removes the venue when deletion is allowed. Review usage before deleting so you understand which events are connected to the venue.
Venue Detail View
The venue detail view is used to create or edit venue records.
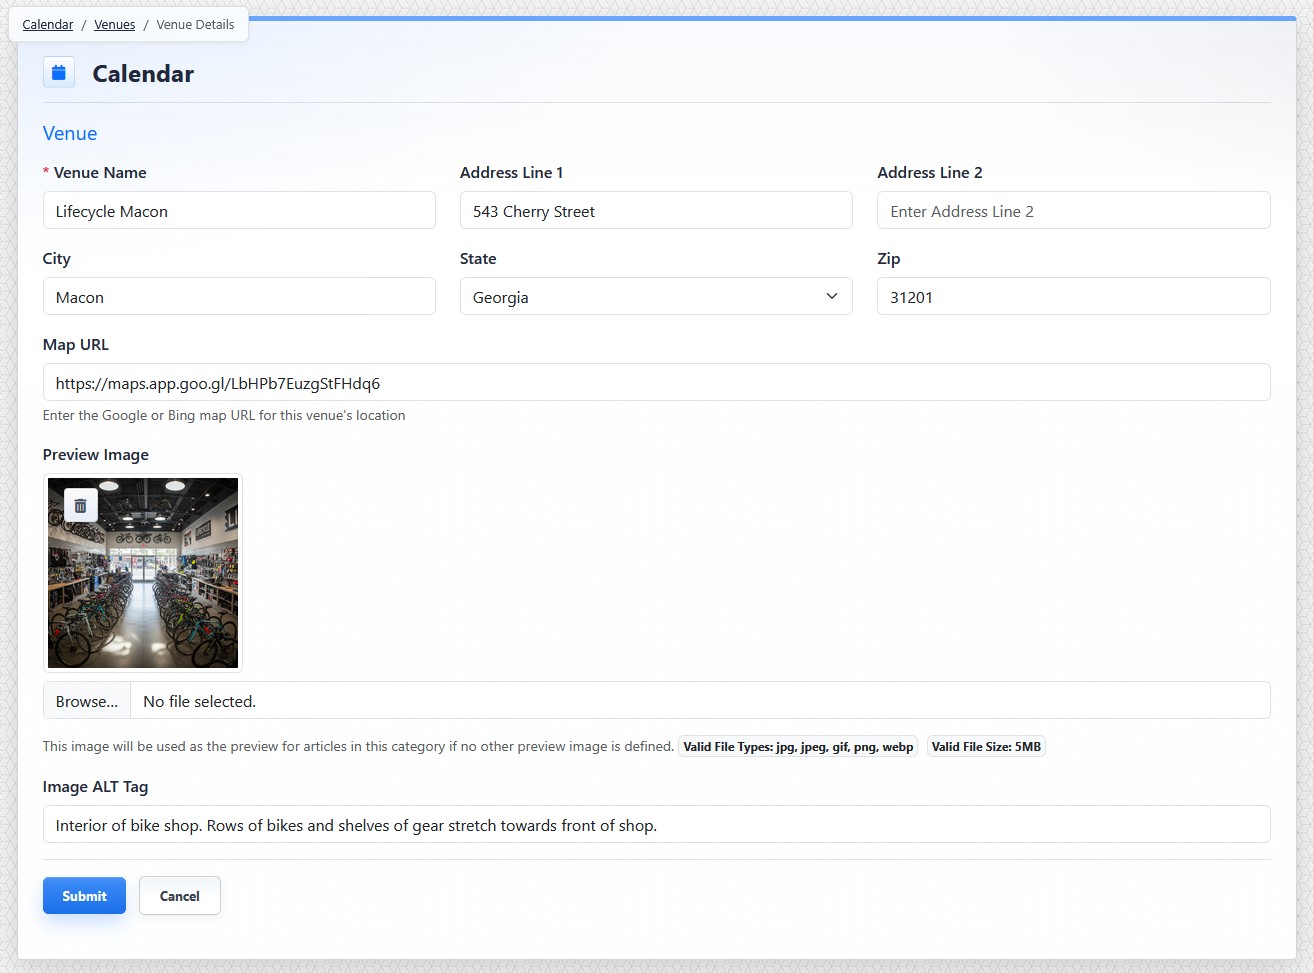
The venue detail view stores location details, a map URL, and an optional venue image.
Venue fields include:
- Venue Name
- Address Line 1
- Address Line 2
- City
- State
- Zip
- Map URL
- Preview Image
- Image Alt Tag
Venue Name is required and must be unique.
Map URL stores a link to an online map for the venue location, such as a Google Maps or Bing Maps link.
The preview image can be used for a photo of the venue or location. Use Image Alt Tag to describe the image.
Creating a Venue
To create a venue:
- Open the Calendar tool from the Plugins accordion.
- Click Venues.
- Click Add Venue.
- Complete the venue fields.
- Add a preview image and alt text when needed.
- Click Submit.
Editing a Venue
To edit a venue:
- Open the Venues module.
- Find the venue.
- Click the venue's Edit button.
- Update the needed fields.
- Click Submit.
The controls you see depend on your CMS permissions. Users with restricted permissions may not be able to access all features.
Learn More
For assigning a venue to an event, see Adding or Editing a Calendar Event. For organizer records, see Managing Calendar Organizers.