 Ask Alvin (AI Chat)
Adding or Editing a Redirect
Use the redirect detail view to create a new redirect or edit an existing redirect.
The controls you see depend on your CMS permissions. Users with restricted permissions may not be able to access all features.
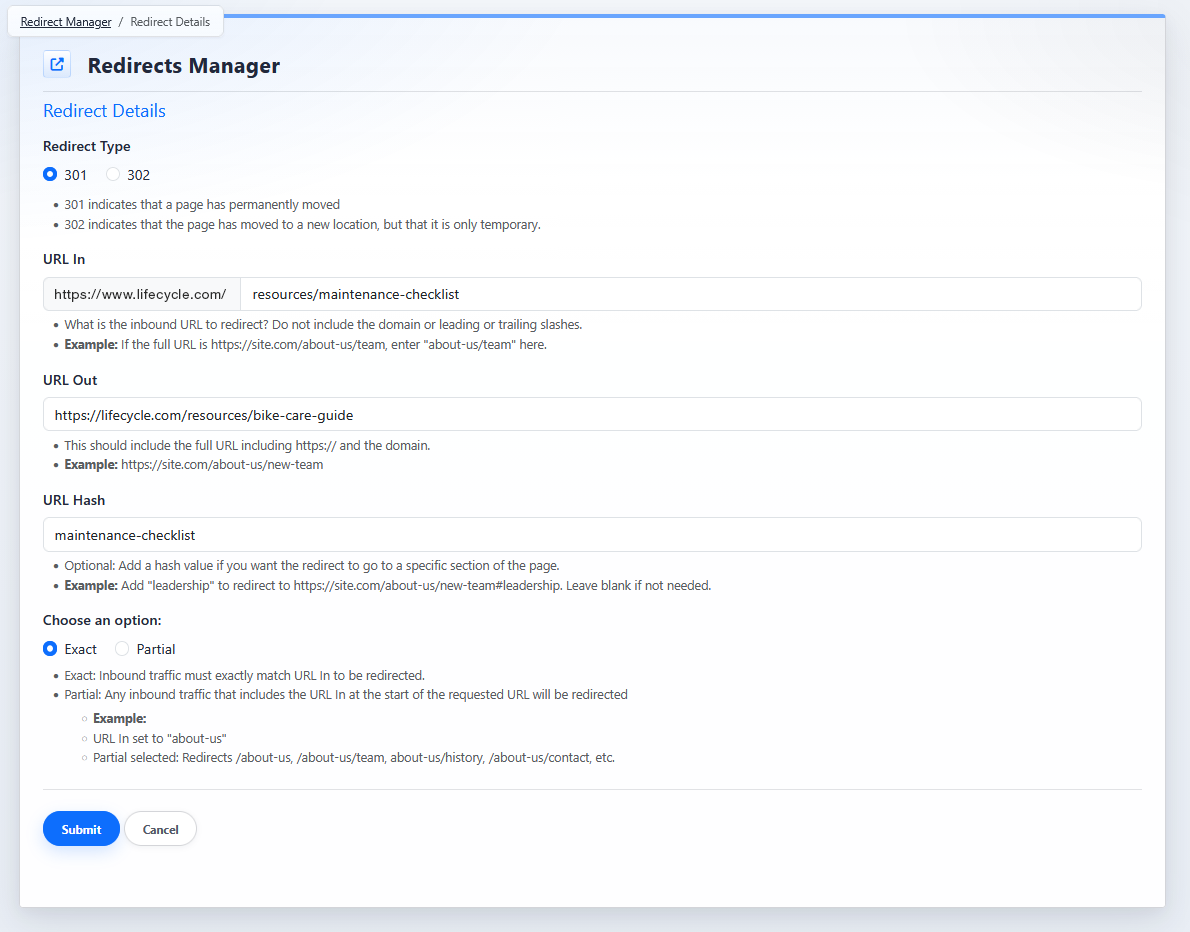
The Redirect Details view is used when adding a new redirect or editing an existing redirect.
Add a Redirect
- Open the Redirects Manager from the System accordion.
- Click the Add New Redirect button.
- Select the Redirect Type.
- Enter the URL In value.
- Enter the URL Out value.
- Enter a URL Hash only if the redirect should go to a specific section of the destination page.
- Choose Exact or Partial matching.
- Click Submit.
Edit an Existing Redirect
- Open the Redirects Manager from the System accordion.
- Find the redirect in the list view.
- Click the redirect's Edit button.
- Update the needed fields.
- Click Submit.
A redirect takes effect immediately after it is saved.
Main Redirect Fields
- Redirect Type: determines whether the redirect is a 301 or 302.
- URL In: the inbound path visitors are trying to reach.
- URL Out: the full destination URL visitors should be sent to.
- URL Hash: an optional page-section target on the destination URL.
- Exact or Partial: controls how closely the inbound URL must match before the redirect is triggered.
URL In must be unique. If another redirect already uses the same inbound URL, the redirect cannot be saved until the duplicate is corrected.
Learn More
For more about Redirect Type, see Choosing Between 301 and 302 Redirects. For more about URL formatting, see Understanding URL In, URL Out, and URL Hash. For matching behavior, see Exact vs Partial Redirect Matching.