 Ask Alvin (AI Chat)
Adding Images in the Content Editor
The Image tool inserts images into the editor. Images can be selected from the server, uploaded from your computer, linked to another destination, or generated with the built-in AI image tool.
Click the Image icon in the toolbar to open the Image Properties dialog.

Image Info
Use the Image Info tab to choose the image and define its basic display information.
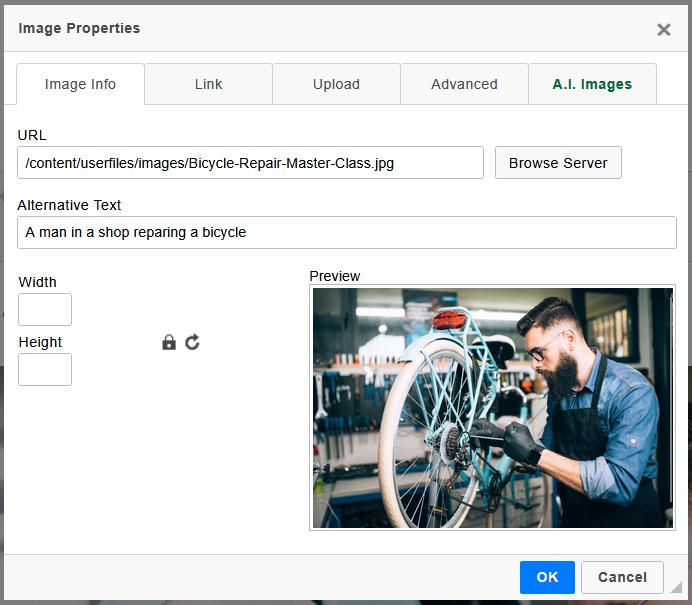
The Image Info tab controls the image URL, alternative text, dimensions, and preview.
The URL field stores the image path. Click Browse Server to open the file manager, where you can select an existing image or upload a new image. You can also enter the direct image URL.
Use Alternative Text to describe the image for screen readers and for cases where the image does not load. Alternative text should describe the image's purpose in the page context.
The Width and Height fields set fixed pixel dimensions. Leave these fields blank for responsive images unless a specific fixed size is required.
The Preview area shows the selected image based on the current settings.
Uploading an Image
You can upload an image from the file manager after clicking Browse Server on the Image Info tab.
The Upload tab is another way to add a new image file from your computer. Choose the file, then click Send it to the Server. After the upload completes, the image URL is populated automatically.
Linking an Image
Use the Link tab to make the image clickable. Enter the destination URL and choose a target when needed.
Linked images still need meaningful alternative text. If the image functions like a button or call to action, the alt text should explain the action or destination.
Advanced Image Options
The Advanced tab includes additional options such as ID, language direction, language code, long description URL, stylesheet classes, advisory title, and inline style.
Use these settings only when a specific layout, accessibility, or development need requires them.
Generating AI Images
Use the A.I. Images tab to generate an image from a written prompt.
Enter a prompt that describes the subject, setting, style, and intended use of the image. Choose an Aspect Ratio, then click Generate. Generated images appear as thumbnails in the dialog.
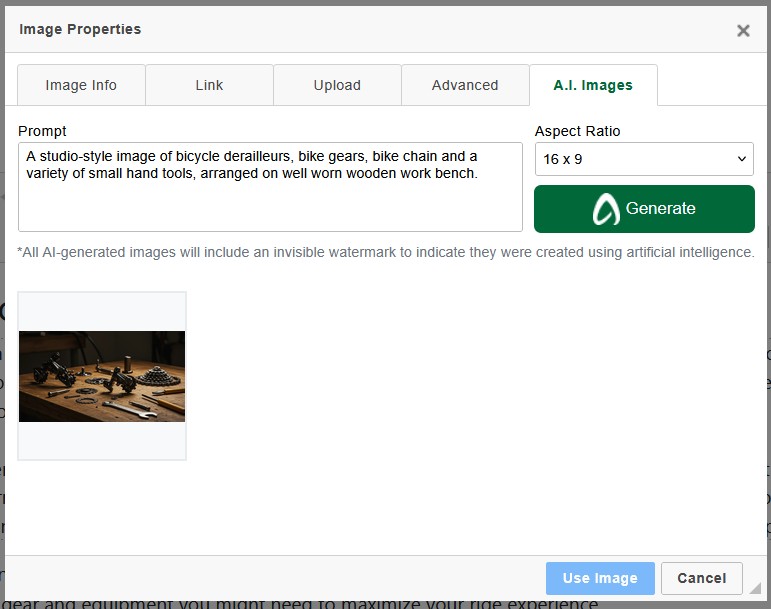
The A.I. Images tab generates image options from a written prompt and selected aspect ratio.
Select a generated image and click Preview to review it at a larger size. Click Use Image to insert the selected image into the editor.
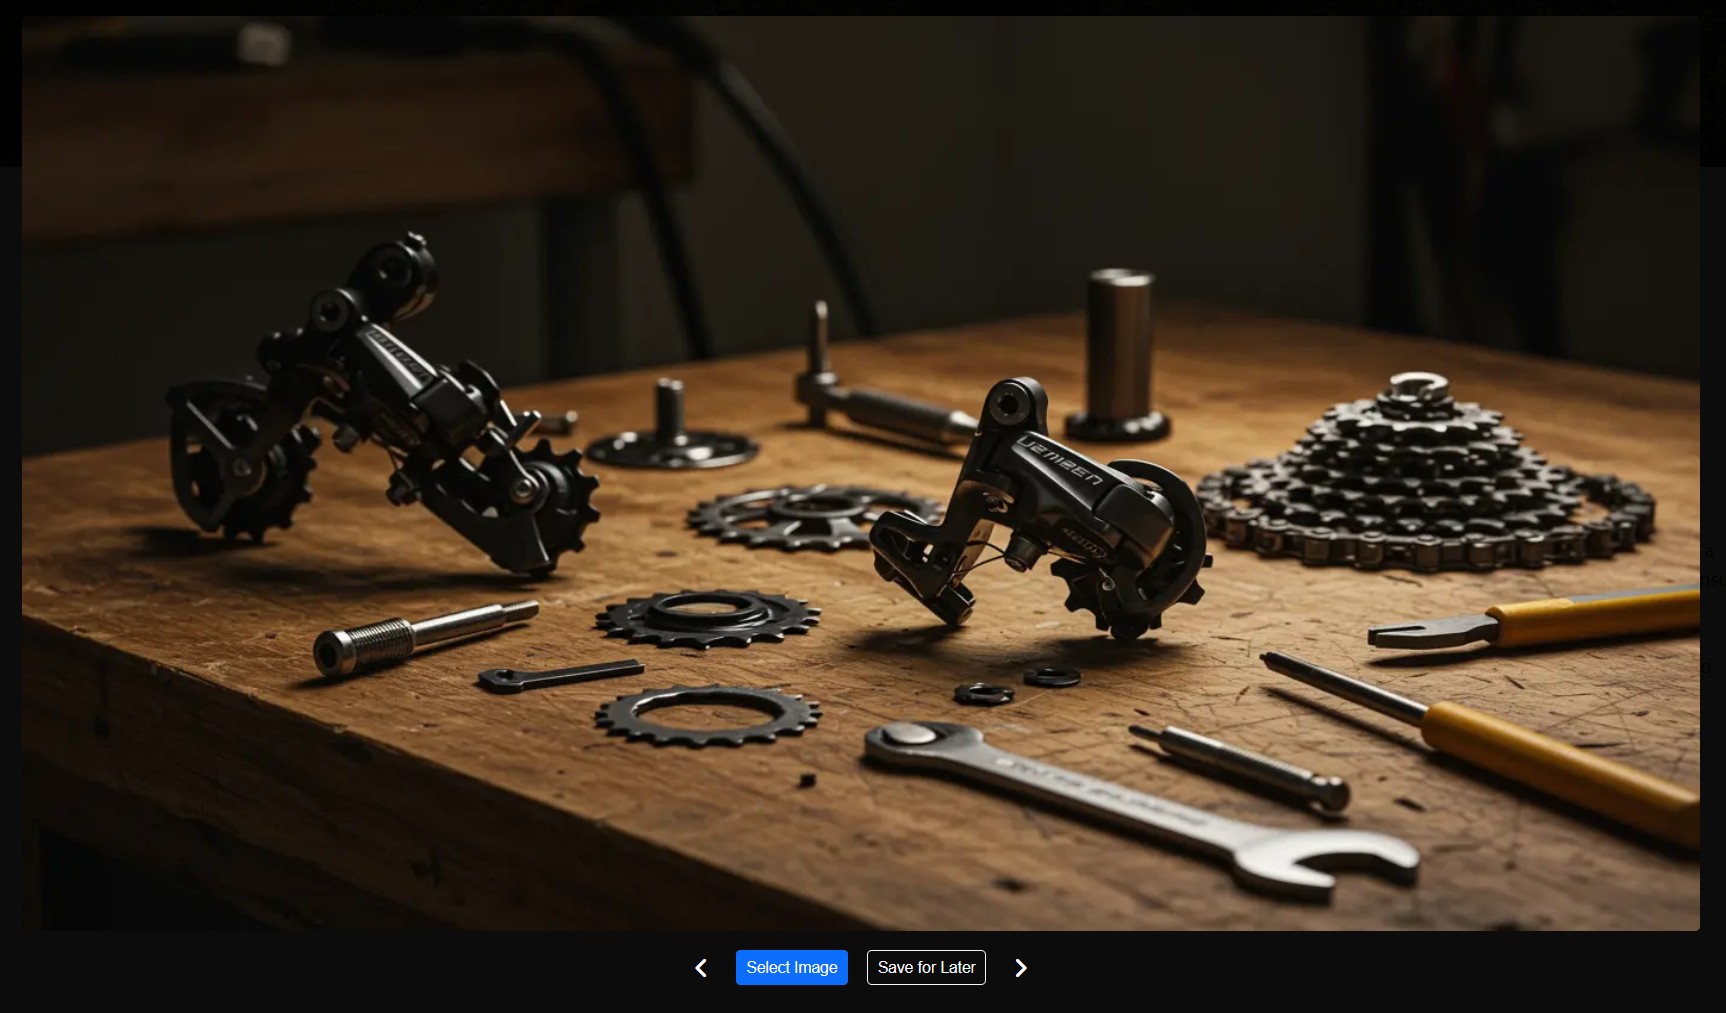
Preview generated images before inserting one into the editor.
When an AI image is inserted, the CMS automatically generates alternative text. Review and edit the alt text before saving so it accurately describes the selected image.
AI-generated images include an invisible watermark indicating they were created using artificial intelligence. Do not generate images of real individuals or copyrighted or trademarked objects.
Image Best Practices
Use images that support the content rather than decorate it unnecessarily. Review image quality, crop, relevance, and alternative text before saving.
For responsive layouts, leave fixed width and height values blank and use Mobi Workspace Styles or module settings for visual presentation when possible.
Styling Images After Insertion
After an image is inserted, select it in the editor and open Mobi Workspace. The Styles view can provide image-specific options such as object fit, object position, aspect ratio, shape, shadow, spacing, and border treatments.
Use Styles when the image needs a consistent visual treatment, such as a fixed aspect ratio, rounded shape, shadow, or margin, instead of forcing those choices through fixed width and height fields.
Learn More
For broader AI image guidance, see Generating AI Images. For applying image shape, aspect ratio, margin, and shadow styles, see Applying CMS Styles. For adding image-based layout sections, see Using Modules to Build Pages.